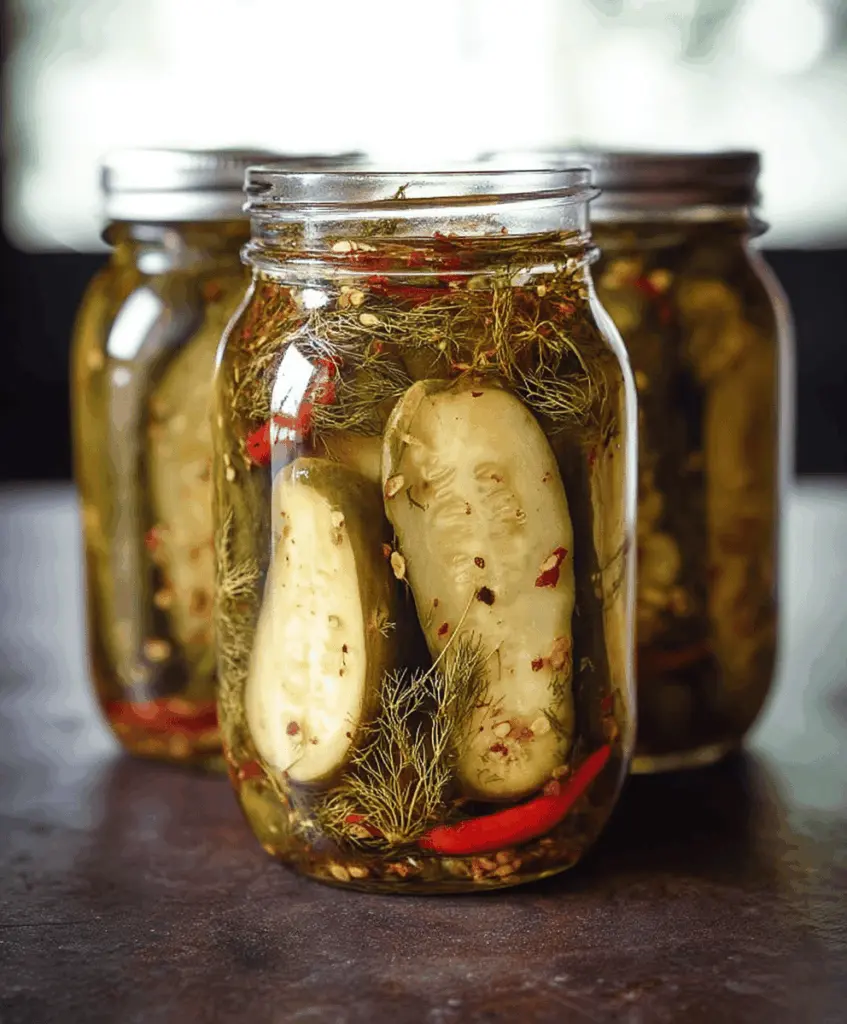
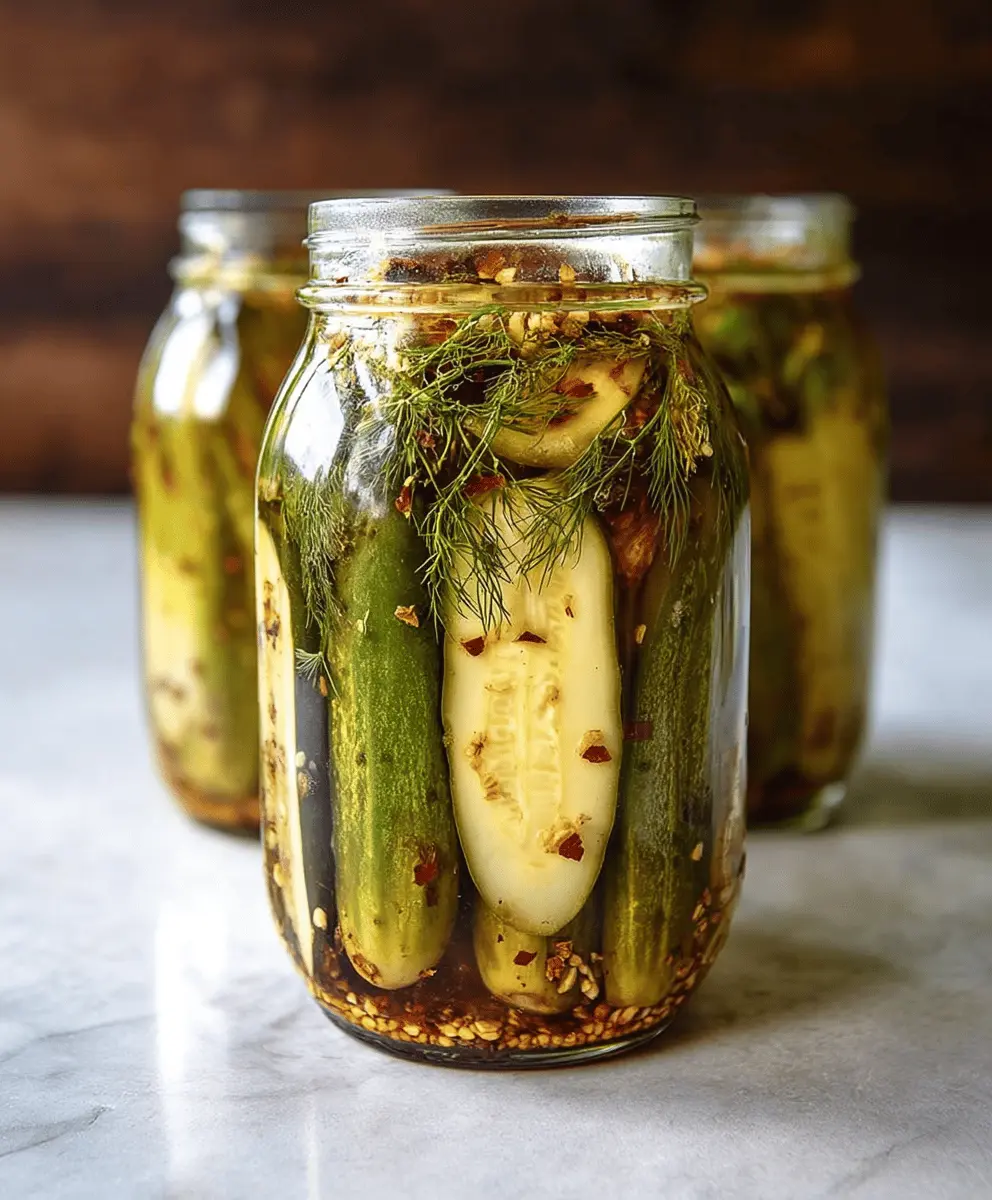
These Killer Spicy Garlic Dill Pickles pack a punch! With a zesty mix of garlic, dill, and a kick of heat, they’re perfect for snacking or adding to burgers.
Trust me, once you try them, you’ll be munching on these crunchy delights at every meal! I love to whip up a batch and share them with friends—it’s always a hit! 😄
Key Ingredients & Substitutions
Cucumbers: Use small to medium pickling cucumbers for the best crunch. If you can’t find pickling cucumbers, English cucumbers work too, though they may be less crunchy. I love using them sliced into spears for easy snacking!
Garlic: Fresh garlic cloves are key for that bold flavor. You can substitute with garlic powder in a pinch, but fresh garlic gives the best punch. I always go for more than a few cloves to really boost that garlic kick!
Vinegar: Distilled white vinegar keeps the pickles crisp and tangy. If you want something different, apple cider vinegar offers a milder taste. Just remember it may change the flavor slightly!
Spices: Crushed red pepper flakes are essential for heat, but you can swap them out for fresh jalapeños or even go for milder spices if you’re sensitive to heat. I like to adjust the spice level based on my guests!
How Do You Get the Perfect Crunch in Pickles?
The biggest challenge with homemade pickles is getting that satisfying crunch! Here are my tips:
- Start with fresh and firm cucumbers. Look for ones that feel heavy for their size.
- Make sure to pack them tightly in the jars to minimize air pockets. This keeps them crisp and flavorful.
- Don’t skip sterilizing your jars! This helps prevent spoilage and maintains crunchiness.
- Let the pickles ferment at room temperature, but refrigerate them after to slow down the process and preserve the texture.
With these steps, you’re sure to enjoy perfectly crunchy spicy garlic dill pickles!
Killer Spicy Garlic Dill Pickles
Ingredients You’ll Need:
For The Pickling Base:
- 6 to 8 small to medium fresh cucumbers (pickling cucumbers), sliced into spears or rounds
- 4-5 cloves garlic, peeled and smashed
For The Brine:
- 2 cups water
- 1 cup distilled white vinegar
- 2 tablespoons kosher salt or pickling salt
- 1 tablespoon sugar
- 2 teaspoons crushed red pepper flakes (adjust to taste for spiciness)
For The Spices:
- 2 teaspoons dill seeds or 4-5 fresh dill sprigs
- 1 teaspoon black peppercorns
- 1/2 teaspoon mustard seeds (optional)
- 1/2 teaspoon coriander seeds (optional)
How Much Time Will You Need?
This recipe takes about 15 minutes to prepare and then you’ll need to let the cucumbers ferment for 2 to 7 days at room temperature, depending on how tangy you want them. After that, just refrigerate them for the best flavor! So, all in all, it’s an easy and fun process!
Step-by-Step Instructions:
1. Sterilize Your Jars:
Begin by sterilizing your jars and lids. You can do this by boiling them in water for 10 minutes or run them through a dishwasher on the hot cycle. This keeps your pickles fresh and free of harmful bacteria.
2. Prepare the Brine:
In a small pot, mix together the water, distilled white vinegar, kosher salt, and sugar. Heat this mixture over medium-high heat until it reaches a boil and the salt and sugar have fully dissolved. Once done, remove from the heat and let it cool to room temperature.
3. Pack the Cucumbers:
Take your sterilized jars and tightly pack in the sliced cucumbers either in spears or rounds. Make sure they are snugly placed for the best flavor.
4. Add the Flavorings:
Next, into each jar, add the smashed garlic cloves, dill seeds (or sprigs), black peppercorns, mustard seeds, coriander seeds, and the crushed red pepper flakes. Feel free to adjust the amount of red pepper flakes according to your spice preference!
5. Pour in the Brine:
Pour the cooled brine over the cucumber slices, ensuring they’re fully submerged. Leave about 1/2 inch of space at the top of the jars to allow for expansion during fermentation.
6. Seal and Store:
Seal the jars tightly with their lids. Store them in a cool, dark place to start the fermentation process!
7. Fermentation:
Let your pickles sit at room temperature for about 2 to 3 days for a quick pickle. If you prefer a tangier flavor, let them ferment for up to a week, checking on them daily to get the flavor you love.
8. Refrigerate Your Pickles:
Once they’ve fermented to your liking, move the jars into the refrigerator. The pickles will taste best after being chilled for at least 24 hours, and they’ll last for several weeks in the fridge.
9. Enjoy!
Your Killer Spicy Garlic Dill Pickles are ready to enjoy! Eat them as a snack, add them to sandwiches, or serve them as a delightful side. Each bite is a burst of flavor!
This recipe balances fresh dill and garlic with a fiery kick, giving you crisp, flavorful pickles that elevate any meal! Enjoy your homemade masterpiece!

FAQ for Killer Spicy Garlic Dill Pickles
Can I Use Different Types of Cucumbers?
Yes! While pickling cucumbers are the best choice for crunch, you can also use English cucumbers. Just be aware that they may not be as crispy. Look for firm, fresh cucumbers for the best results!
How Do I Adjust the Spice Level?
If you prefer milder pickles, you can reduce the amount of crushed red pepper flakes or omit them altogether. For extra heat, consider adding sliced jalapeños or more red pepper flakes to the brine.
What Happens if My Pickles Float Above the Brine?
To keep your pickles submerged, you can use a weight or a clean, small jar filled with water to press them down. This ensures they stay fully immersed in the brine for even flavoring.
How Long Will These Pickles Last in the Fridge?
Your homemade pickles can last in the refrigerator for several weeks. Just be sure to keep them sealed tight and enjoy them within a month for the best flavor and crunch!