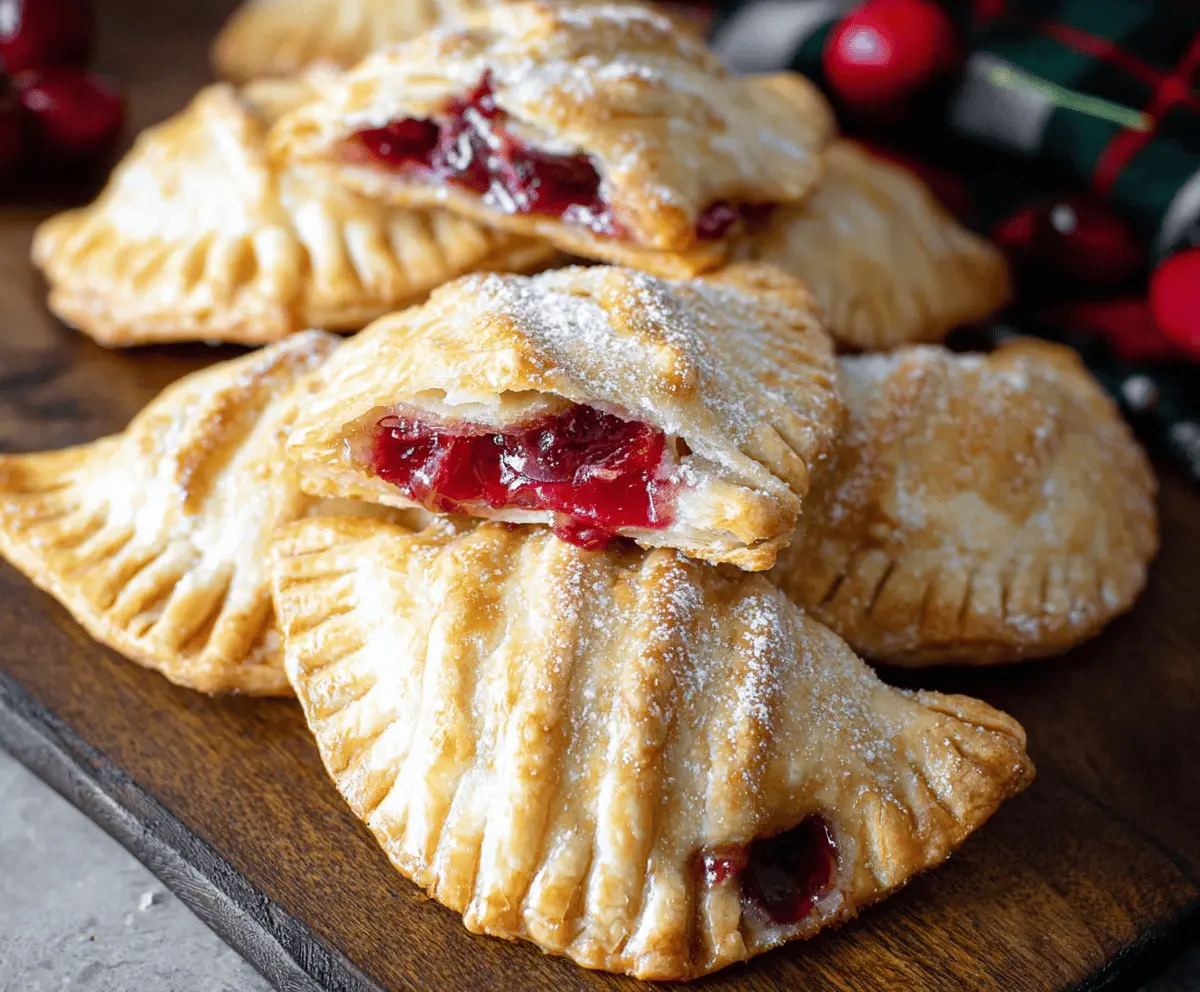
These Cherry Hand Pies are sweet little pockets of joy filled with juicy cherries and wrapped in a flaky crust. Perfect for a snack or dessert on the go!
They look fancy but are super easy to make. I love enjoying them warm, maybe with a scoop of ice cream—it just makes everything better, right? 🍦
Key Ingredients & Substitutions
Cherries: Fresh cherries are ideal for this recipe, but frozen ones work perfectly too. Make sure to thaw and drain them to avoid excess moisture. If cherries aren’t available, you can try other fruits like blueberries or peaches!
Sugar: Granulated sugar sweetens the filling. You could use brown sugar for a deeper flavor or a sugar substitute if you’re watching calories. Just keep in mind that it may alter the sweetness slightly.
Cornstarch: This is crucial for thickening the cherry filling. If you don’t have it, all-purpose flour can work, but it may take a little longer to thicken.
Almond extract: This adds a lovely hint of flavor that complements the cherries. If you don’t have any, just skip it or substitute with an equal amount of more vanilla extract.
Pie crust: I love the convenience of store-bought refrigerated pie crusts. If you’re feeling adventurous, homemade pie dough is fantastic too! You could even use puff pastry for a flakier texture.
How Do You Properly Seal Hand Pies?
Sealing your hand pies correctly ensures the filling stays inside during baking. Here’s how to do it well:
- After placing the filling, brush a little water around the edges of the dough circle. This helps the dough stick together.
- Fold the dough over to form a half-moon shape. Make sure the filling isn’t spilling out!
- Use a fork to press down along the edges. This not only adds a decorative touch but also creates a strong seal.
- Lastly, always cut a small slit in the top of the pies. This prevents the filling from bursting out while they bake.
With these tips, you’ll have perfectly sealed and delicious hand pies every time!

Cherry Hand Pies
Ingredients You’ll Need:
- 2 cups fresh or frozen pitted cherries (if using frozen, thaw and drain)
- 1/2 cup granulated sugar
- 2 tablespoons cornstarch
- 1 tablespoon lemon juice
- 1 teaspoon vanilla extract
- 1/4 teaspoon almond extract (optional)
- 1 package (2 sheets) refrigerated pie crusts or homemade pie dough
- 1 egg, beaten (for egg wash)
- Powdered sugar, for dusting
How Much Time Will You Need?
This delightful recipe takes about 15 minutes to prepare and 20-25 minutes to bake. Including cooling time, you’ll need about 45 minutes in total before you can enjoy your delicious cherry hand pies!
Step-by-Step Instructions:
1. Preheat and Prepare the Baking Sheet:
First, preheat your oven to 375°F (190°C). While that’s heating up, line a baking sheet with parchment paper so your hand pies don’t stick to the pan.
2. Make the Cherry Filling:
In a medium bowl, mix together the pitted cherries, granulated sugar, cornstarch, lemon juice, vanilla extract, and almond extract (if you’re using it). Stir gently until everything is combined. Let this mixture sit for about 10 minutes; this will help thicken your filling!
3. Roll Out the Dough:
On a lightly floured surface, roll out your pie crust. Use a round cookie cutter or a glass (about 4-5 inches in diameter) to cut out circles from the dough. You should have enough to make around 8-10 hand pies.
4. Fill the Pies:
Take about 1 to 2 tablespoons of the cherry filling and place it in the center of each dough circle. Make sure not to overfill; you want to keep the delicious filling inside!
5. Seal the Pies:
Before sealing, brush a little water around the edges of each dough circle. Now, fold the dough over to create a half-moon shape. Press the edges using a fork to seal them tightly and create a decorative edge.
6. Apply the Egg Wash:
Using a brush, apply the beaten egg to the tops of each hand pie. This will give them a beautiful golden color as they bake!
7. Prepare for Baking:
Place your hand pies on the lined baking sheet. Cut a tiny slit or poke a few holes in the top of each pie. This lets steam escape and prevents your pies from bursting open!
8. Bake in the Oven:
Now it’s time to bake! Place the baking sheet in the preheated oven and bake for 20-25 minutes, or until the hand pies are golden brown and crispy.
9. Cool and Dust:
Once they’re done baking, take the hand pies out of the oven and let them cool slightly. Before serving, dust them with some powdered sugar for that final sweet touch.
Enjoy these delightful cherry hand pies warm or at room temperature! They’re perfect for sharing, but you might just want to keep them all to yourself! 🍒🥧
Can I Use Different Fruits for This Recipe?
Absolutely! While cherries are traditional, you can substitute with other fruits like blueberries, raspberries, or even peaches. Just adjust the sugar according to the sweetness of the fruit you choose.
What Is the Best Way to Store Leftover Hand Pies?
Store any leftover hand pies in an airtight container at room temperature for up to 3 days. If you want them to last longer, refrigerate them, but keep in mind they may lose some crispiness. Reheat in the oven for a few minutes to restore that flaky texture!
Can I Prepare These Hand Pies in Advance?
Absolutely! You can assemble the hand pies ahead of time. Just cover them and store them in the fridge for up to a day before baking. If you want to freeze them, assemble and freeze them before baking. When you’re ready to bake, go straight from the freezer to the oven, adding a few extra minutes to the baking time!
How Do You Know When the Hand Pies Are Done Baking?
Look for a golden brown color on the crust. The filling might bubble slightly out of the holes you made, which is a good sign! If they appear golden and look flaky, they are ready to come out of the oven.