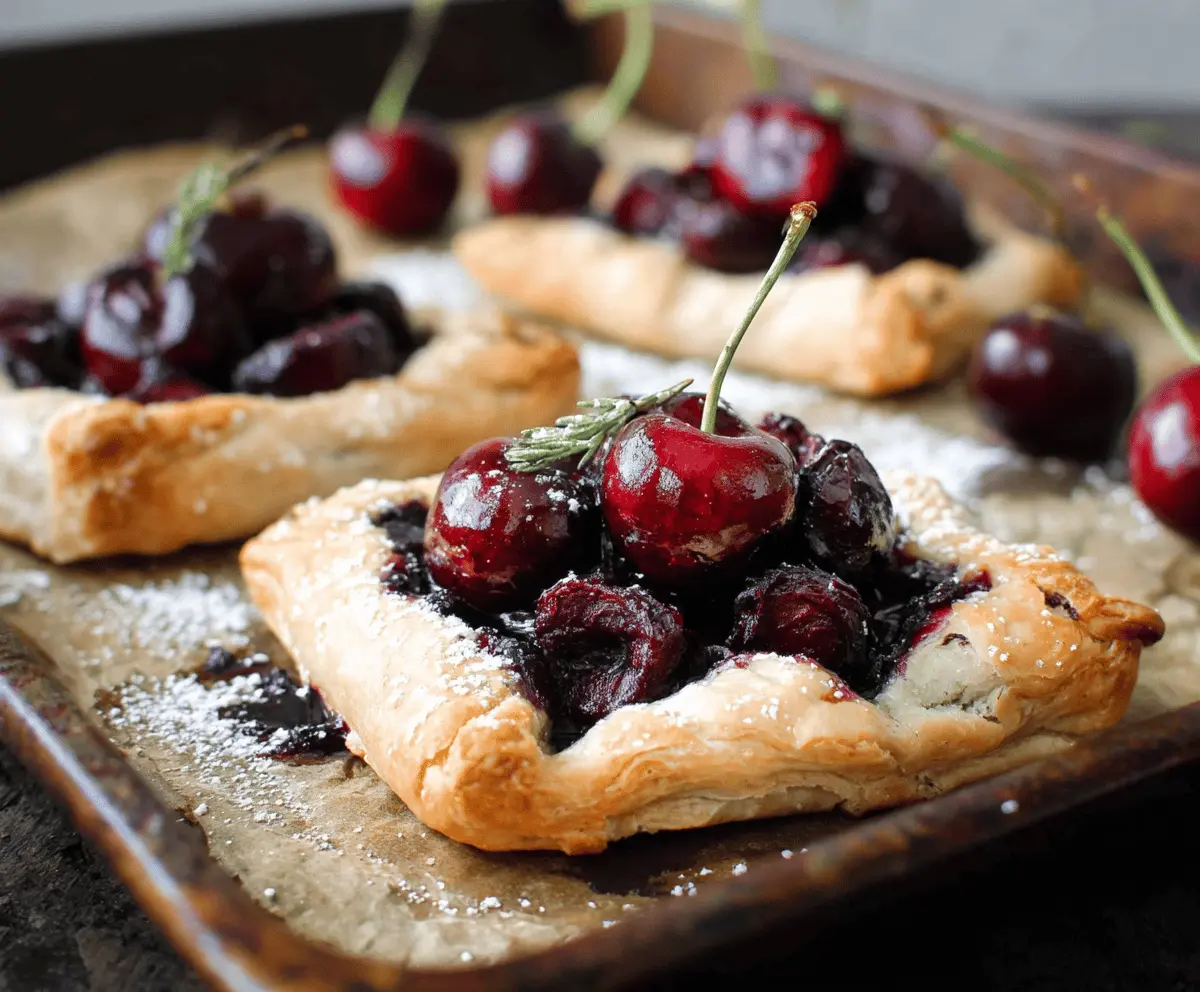
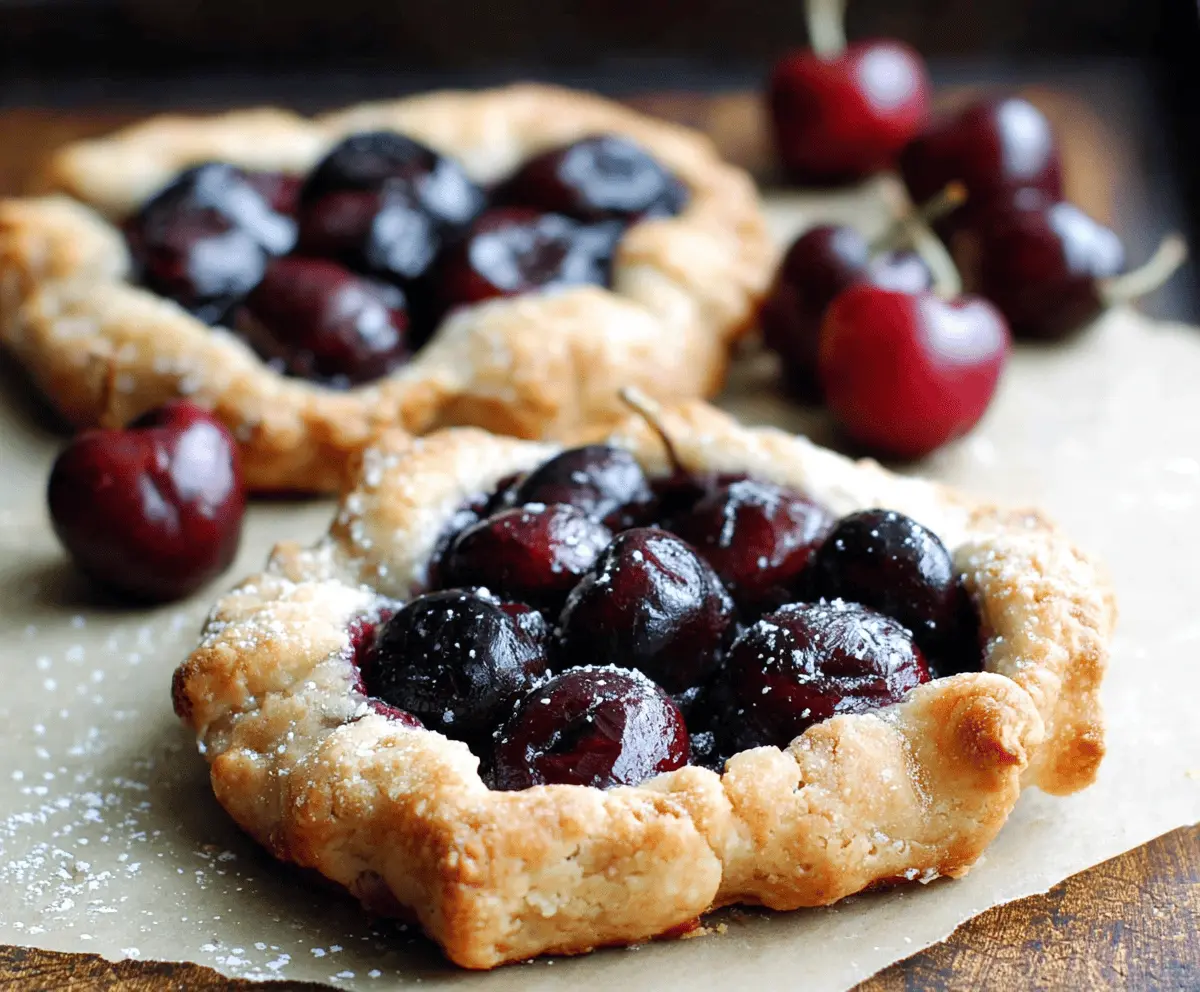
These Easy Rustic Cherry Tarts are a treat that everyone will love! They feature sweet cherries baked inside a simple, flaky crust. Perfect for any time of year!
Making these tarts is super fun and a bit messy—just the way baking should be! I love serving them warm with a scoop of ice cream. Yum! 🍦
Key Ingredients & Substitutions
All-Purpose Flour: This is the base for the tart crust. If you’re gluten-free, you can use a gluten-free flour blend, but the texture may vary.
Unsalted Butter: Cold butter is key for a flaky crust. If you want a dairy-free version, try using coconut oil or a vegan butter substitute.
Cherries: Fresh cherries give the best flavor, but frozen cherries work just fine, especially when out of season. Just be sure to thaw and drain excess moisture.
Cornstarch: This thickens the filling and helps keep it from being runny. If you don’t have cornstarch, use flour, but reduce the amount slightly to avoid a pasty taste.
Egg Wash: The beaten egg gives the crust a golden color. You can skip this for a vegan option or brush with almond milk instead.
How Do I Achieve a Flaky Tart Crust?
A flaky crust can be a bit tricky, but with some care, you can nail it! The key is to handle the dough as little as possible and work with cold ingredients.
- Keep your butter chilled. If the butter warms up, it won’t create those flaky layers.
- When adding water, do so gradually. Mix just until the dough holds together; over-mixing will make it tough.
- Chill the dough in the fridge. This solidifies the butter again, helping you achieve that flaky texture later when baked.
Easy Rustic Cherry Tarts
Ingredients You’ll Need:
- 1 ¼ cups all-purpose flour
- ¼ cup granulated sugar
- ¼ teaspoon salt
- ½ cup unsalted butter, cold and cubed
- 3-4 tablespoons ice water
- 2 cups fresh or frozen pitted cherries
- ¼ cup granulated sugar (for filling)
- 1 tablespoon cornstarch
- 1 teaspoon lemon juice
- ½ teaspoon vanilla extract
- 1 egg, beaten (for egg wash)
- Coarse sugar, for sprinkling (optional)
How Much Time Will You Need?
This delightful recipe takes about 20 minutes of prep time, plus 30 minutes for chilling the dough and 25-30 minutes for baking. In total, you’re looking at about 1 hour and 20 minutes. But remember, the best part is enjoying the delicious results!
Step-by-Step Instructions:
1. Prepare the Oven and Baking Sheet:
First things first! Preheat your oven to 400°F (200°C) and line a baking sheet with parchment paper. This helps prevent sticking and makes cleanup a breeze.
2. Make the Tart Dough:
In a large mixing bowl, combine the flour, sugar, and salt. Add the cold, cubed butter and use a pastry cutter or your fingers to cut it in until it resembles coarse crumbs. This is where those flaky layers come from! Don’t worry if it’s a bit uneven.
3. Bring the Dough Together:
Slowly add ice water, one tablespoon at a time, mixing it gently until the dough just comes together. Be careful not to overwork it. Once combined, shape the dough into a disc, wrap it in plastic wrap, and refrigerate it for at least 30 minutes. This will make it easier to roll out later.
4. Prepare the Cherry Filling:
In another bowl, toss together the cherries, sugar, cornstarch, lemon juice, and vanilla extract. Make sure the cherries are coated evenly—this helps create a juicy filling that won’t be too runny when baked.
5. Roll Out the Dough:
After chilling, take the dough out of the fridge and place it on a lightly floured surface. Roll it out into a circle about 12 inches in diameter. If you prefer smaller tarts, you can cut the dough into 4-6 squares or circles instead.
6. Assemble the Tarts:
Place a scoop of the cherry filling in the center of each dough piece, leaving about a 1-inch border all around. Carefully fold the edges of the dough up and over the filling, creating a rustic look with pleats as you go.
7. Add an Egg Wash:
To give the crust a beautiful golden color, brush the edges with the beaten egg. If you like a little sparkle, sprinkle some coarse sugar on top of the crust as well!
8. Bake the Tarts:
Carefully transfer the tarts to your prepared baking sheet and pop them into the oven. Bake for 25-30 minutes or until the crust is golden brown and the cherry filling is bubbling. Your kitchen will smell amazing!
9. Cool and Serve:
Once baked, take them out of the oven and let them cool slightly on the baking sheet. These tarts are delicious warm but also wonderful at room temperature! Serve them as is or with a scoop of vanilla ice cream or a dollop of whipped cream for an extra special treat.
Enjoy your Easy Rustic Cherry Tarts!
Can I Use Frozen Cherries for This Recipe?
Absolutely! Frozen cherries work great in this recipe. Just make sure to thaw them beforehand and drain any excess liquid to avoid a soggy filling.
How Can I Make the Dough Ahead of Time?
You can prepare the dough and keep it wrapped in plastic wrap in the refrigerator for up to 2 days. You can also freeze it for up to a month. Just let it thaw in the fridge overnight before rolling it out!
What’s the Best Way to Store Leftover Tarts?
To store any leftovers, place them in an airtight container and refrigerate for up to 3 days. You can enjoy them cold or reheat them in the oven for a few minutes to regain some crispiness.
Can I Substitute the Sugar with a Natural Sweetener?
Yes, you can use natural sweeteners like honey or maple syrup, but be mindful as they are liquid. Reduce the amount of other liquids slightly, and adjust to taste. Start with about 2 tablespoons and adjust to your preference!