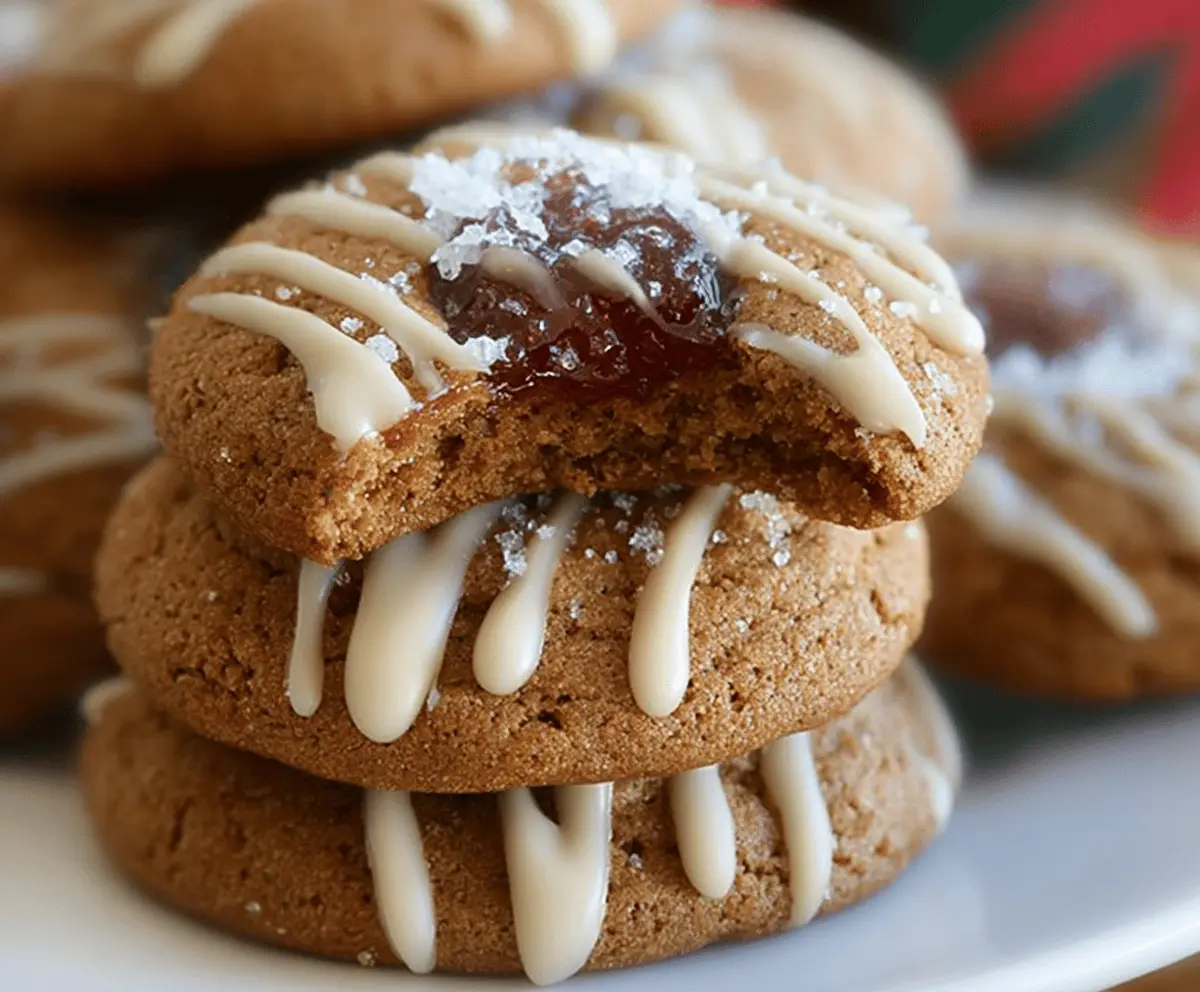
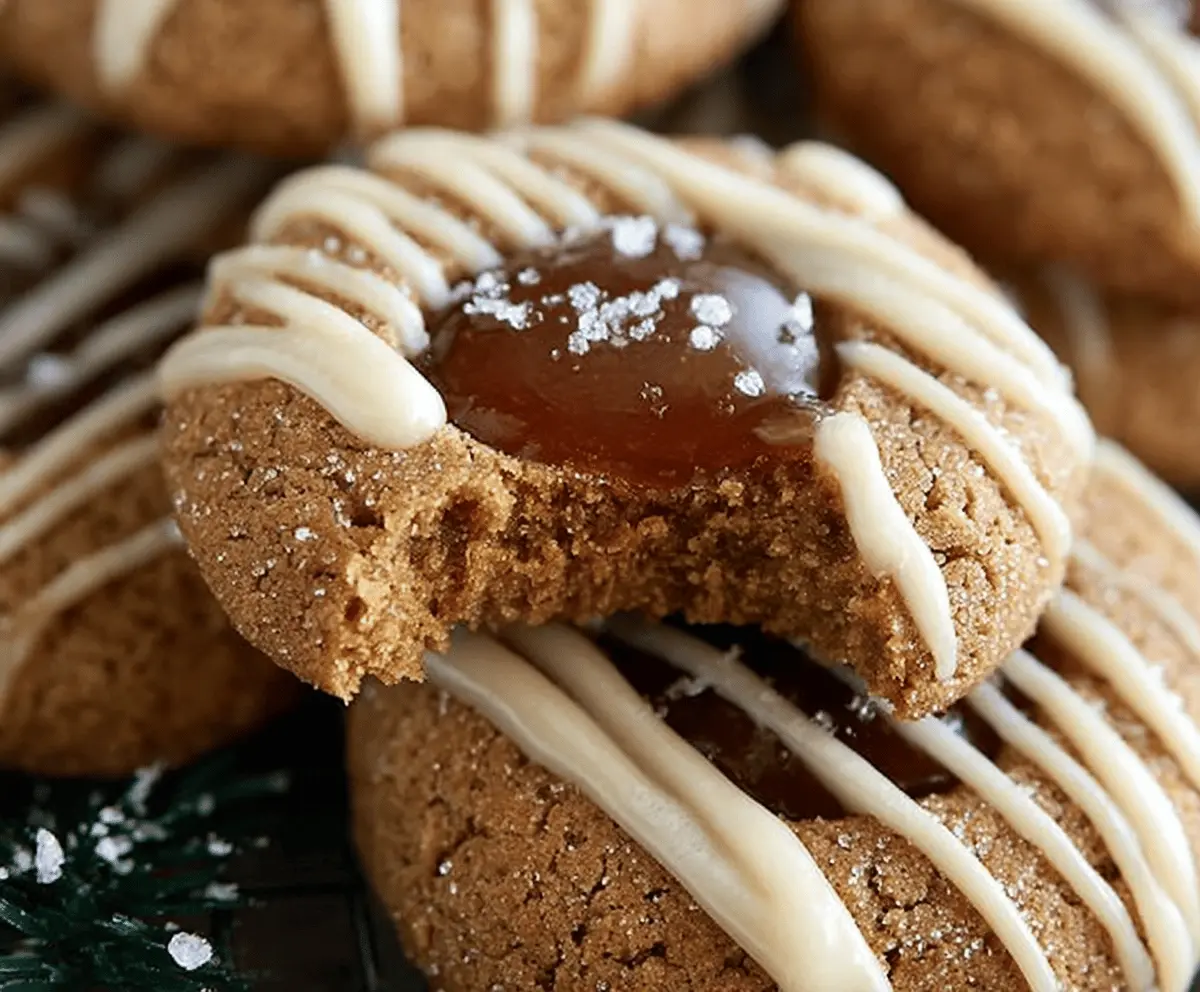
These Gingerbread Thumbprint Cookies are a delightful treat! They are soft, spiced, and filled with sweet jam. Perfect for the holidays and great for sharing—or sneaking a few yourself!
I love how the spicy ginger flavor mixes with the fruity jam. They’re so fun to make, especially when the dough gets a little sticky. It’s like a mini adventure in baking! 😊
Key Ingredients & Substitutions
All-Purpose Flour: This is the base of your cookies. If you want a gluten-free option, you can use a gluten-free flour blend. I find that these blends work well in most baked goods.
Ground Spices: Ground ginger, cinnamon, cloves, and nutmeg give that classic gingerbread flavor. If you’re missing one of these, don’t worry! You can use pumpkin pie spice as a substitute, which has similar flavor notes.
Butter: Unsalted butter is recommended for better control over salt levels. If you need a dairy-free option, you can substitute with coconut oil or a vegan butter alternative. Just make sure it’s softened!
Molasses: It gives the cookies their rich color and distinctive flavor. If you don’t have molasses, you can use honey or maple syrup, but the flavor will be slightly different.
Jam: Raspberry or strawberry is traditional, but feel free to get creative! You can use any flavor you like. Apricot or even a spiced apple jam can add a nice twist.
How Do I Ensure My Cookies Keep Their Shape?
Maintaining the shape of your cookies is key, especially for thumbprints! First, make sure your dough is well-mixed but still soft. When you scoop and roll your balls, avoid adding too much extra flour.
- Chill the dough for about 30 minutes before scooping. This helps firm it up for easier handling.
- When pressing the thumbprint, press gently and make sure it’s deep enough to hold the jam but not to the bottom.
- Keep an eye on the baking time. Overbaking can make them spread out too much, so if they look soft but set, they’re ready!
Gingerbread Thumbprint Cookies
Ingredients You’ll Need:
For the Cookies:
- 2 1/4 cups all-purpose flour
- 2 teaspoons ground ginger
- 1 teaspoon ground cinnamon
- 1/4 teaspoon ground cloves
- 1/4 teaspoon ground nutmeg
- 1/4 teaspoon salt
- 3/4 teaspoon baking soda
- 1/2 cup (1 stick) unsalted butter, softened
- 1/2 cup light brown sugar, packed
- 1 large egg
- 1/4 cup molasses
- 1 teaspoon vanilla extract
- 1/4 cup granulated sugar (for rolling)
- About 1/3 cup jam or preserves (such as raspberry or strawberry)
For the Glaze:
- 1/2 cup powdered sugar
- 1-2 tablespoons milk or cream
- 1/4 teaspoon vanilla extract
How Much Time Will You Need?
This recipe takes about 15 minutes of prep time and 10-12 minutes of baking time, plus cooling time. Overall, expect around 1 hour to make these cookies, allowing them to cool and set before serving.
Step-by-Step Instructions:
1. Preheat and Prepare:
Start by preheating your oven to 350°F (175°C). While that’s warming up, line two baking sheets with parchment paper to help prevent sticking.
2. Mix the Dry Ingredients:
In a medium bowl, whisk together the flour, ground ginger, cinnamon, cloves, nutmeg, salt, and baking soda. This is the spice mix that will give your cookies their gingerbread flavor. Set this mixture aside for now.
3. Cream the Butter and Sugar:
In a large bowl, take your softened butter and brown sugar, then beat them together until it’s nice and fluffy. You can use a hand mixer or a stand mixer for this. It should take about 2-3 minutes.
4. Combine Wet Ingredients:
Next, add in the egg, molasses, and vanilla extract to the butter and sugar mixture. Beat everything together until it’s fully combined and creamy.
5. Combine Dry and Wet Ingredients:
Gradually add the dry ingredients from the first bowl into your wet mixture. Mix until just combined. Your dough should be soft but not sticky, making it easy to handle.
6. Shape the Cookies:
Using a tablespoon, scoop out the dough and roll it into balls between your palms. Then, roll each ball in granulated sugar to give a sweet finish. Place these sugar-coated balls on the prepared baking sheets about 2 inches apart.
7. Create the Thumbprint:
Now comes the fun part! Use your thumb or the back of a small spoon to gently press down in the middle of each dough ball, creating a small indentation. Be careful not to push all the way through!
8. Bake the Cookies:
Pop these lovely cookies in the oven and bake for 10-12 minutes. You want the edges to be set while the centers remain soft. Don’t forget to keep an eye on them!
9. Fill with Jam:
As soon as you take the cookies out of the oven, if the thumbprint has puffed up, gently press it down again. Then fill each indentation with about 1/2 teaspoon of your favorite jam.
10. Cool and Glaze:
Let the cookies cool on the baking sheets for about 5 minutes, then transfer them to a wire rack to cool completely. While they cool, you can prepare the glaze by mixing the powdered sugar, milk (or cream), and vanilla together until it’s a drizzle-able consistency.
11. Drizzle and Serve:
Once the cookies are cool, drizzle the glaze over the top. Allow the glaze to set before you dig in. Enjoy your delicious and festive Gingerbread Thumbprint Cookies!
Can I Use Different Types of Jam?
Absolutely! While raspberry and strawberry are classic choices, feel free to use any jam or preserves you enjoy. Apricot, cherry, or even spiced apple jam can add a unique twist to your cookies!
How Can I Adjust the Spiciness?
If you prefer milder cookies, you can reduce the amount of ginger or cinnamon. Start with 1 teaspoon of ground ginger and 1/2 teaspoon of cinnamon, and adjust to your taste!
Can I Freeze the Dough or Baked Cookies?
Yes! You can freeze the dough for up to 3 months. Shape the dough into balls and freeze until firm, then transfer to a freezer bag. When ready to bake, you can bake them straight from frozen, just add a couple of extra minutes to the baking time. Baked cookies can also be frozen; just allow them to cool completely first, then store in an airtight container.
What’s the Best Way to Store Leftover Cookies?
Store any leftover cookies in an airtight container at room temperature for up to 5 days. If you’re stacking them, consider placing parchment paper between layers to prevent sticking.