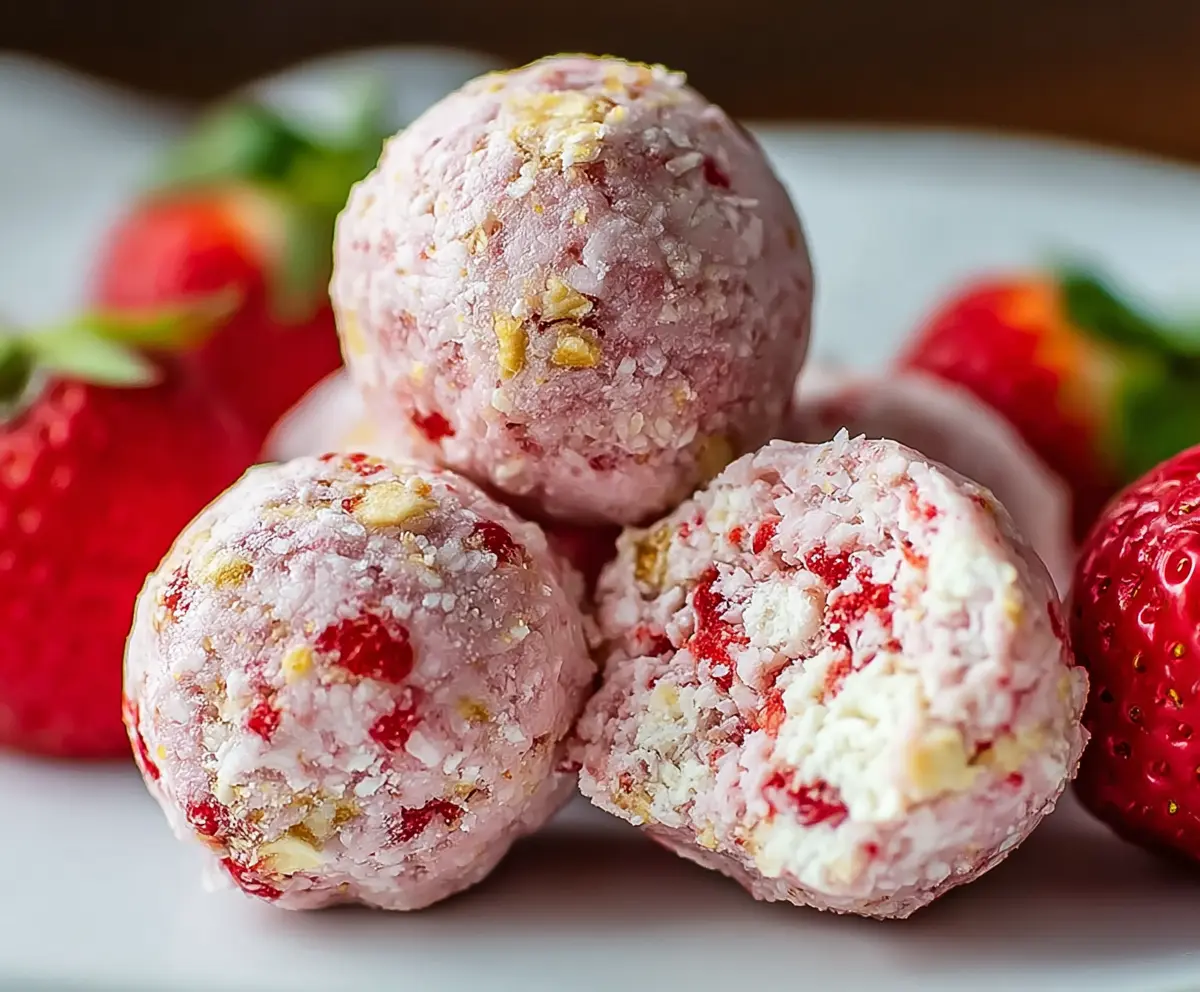
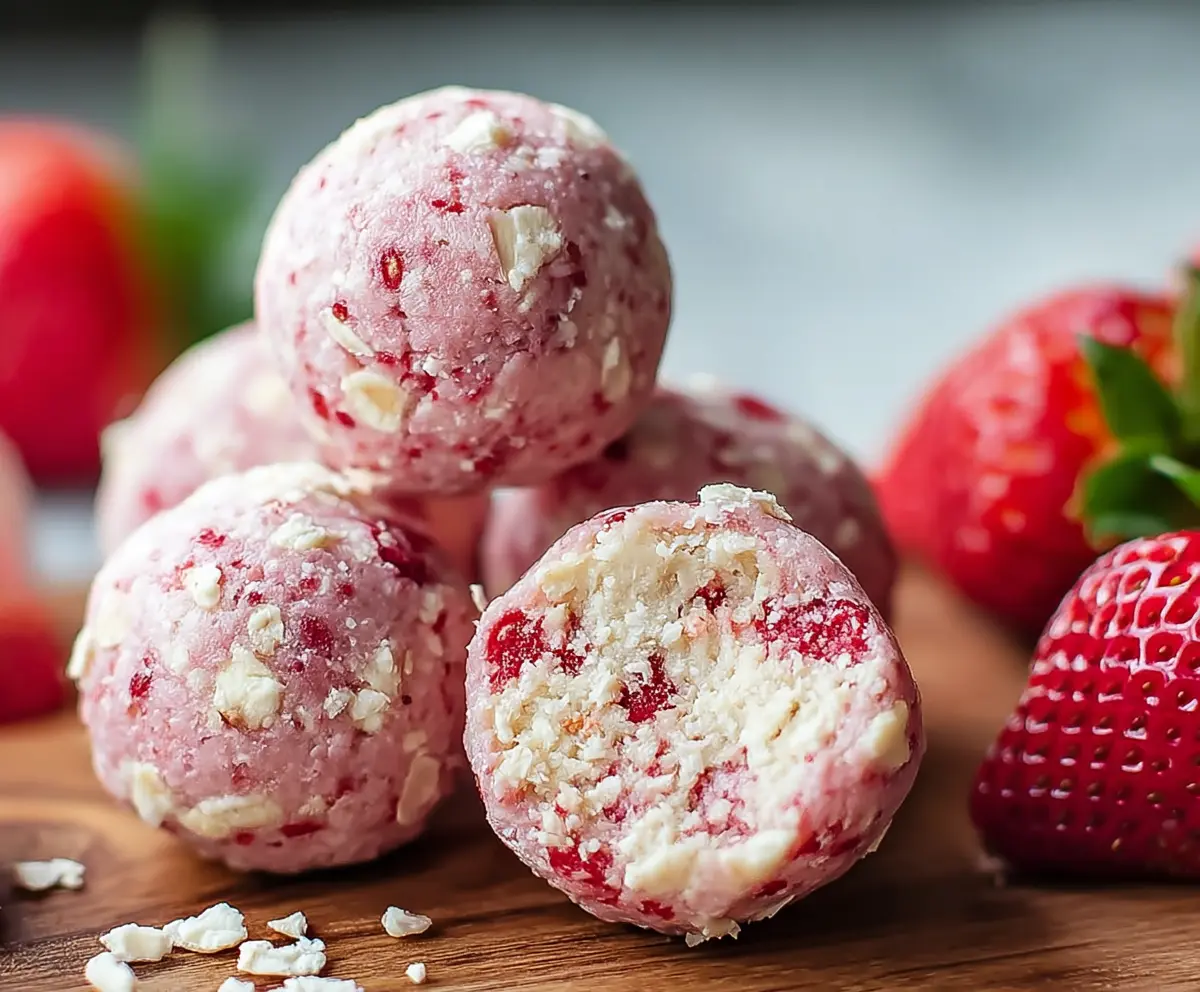
These Strawberry Cheesecake Protein Balls are a tasty bite-sized snack that packs a fruity and creamy flavor. They’re made with healthy ingredients and are super easy to whip up!
Honestly, they make the perfect treat for a quick energy boost. I like to keep a batch in the fridge for a sweet pick-me-up anytime. Who doesn’t love a little cheesecake magic? 🍓
Key Ingredients & Substitutions
Freeze-dried Strawberries: These add an intense strawberry flavor without the extra moisture. If you can’t find freeze-dried strawberries, you could use fresh ones, but you’ll need to adjust moisture levels in the recipe. Also, try dehydrated strawberries if available.
Vanilla Protein Powder: This ingredient boosts the protein content. If you’re allergic to whey, opt for a plant-based protein powder. Flavored protein powders can also work if they’re not too overpowering.
Rolled Oats: I use regular rolled oats for texture. If gluten-free is your goal, go for certified gluten-free oats. For a nutty flavor, try using oat flour instead.
Cream Cheese: Soften it to make mixing easier. For a dairy-free version, use a cashew or coconut cream cheese alternative. You could also swap it for Greek yogurt, but it will change the texture slightly.
Honey or Maple Syrup: I prefer using honey for its natural sweetness and flavor. Maple syrup is a great vegan option. Agave nectar can also be used if you like.
How Do You Form Perfect Protein Balls?
Getting those protein balls to the perfect size and texture is key to their appeal. You want them to hold together well but not be too sticky. Here’s how to do it right:
- Mix dry ingredients first to avoid clumps. Then blend your wet mixture until it’s smooth.
- When combining, use a sturdy spatula to ensure everything incorporates well. Don’t be afraid to use your hands if needed!
- If the dough is too crumbly, moisten it with extra honey or milk, one teaspoon at a time.
- Roll the mixture tightly to form neat balls, which helps with their overall shape and texture.
- Chill the balls in the refrigerator. This step firms them up and enhances their flavor.
How to Make Strawberry Cheesecake Protein Balls
Ingredients You’ll Need:
For the Protein Balls:
- 1 cup freeze-dried strawberries, crushed into small pieces
- 1 cup vanilla protein powder (whey or plant-based)
- 1/2 cup rolled oats (gluten-free if preferred)
- 1/3 cup cream cheese, softened
- 1/4 cup honey or maple syrup
- 1 teaspoon vanilla extract
- Optional: 2 tablespoons chopped nuts or almond flour for texture
Time Needed:
This delicious recipe takes about 15 minutes to prepare, plus an additional 30 minutes in the refrigerator to firm up. So, in just under an hour, you’ll have flavorful and nutritious bites ready for snacking!
Step-by-Step Instructions:
1. Mix the Dry Ingredients:
In a medium-sized bowl, add the crushed freeze-dried strawberries, vanilla protein powder, and rolled oats. Use a spoon or whisk to thoroughly mix these dry ingredients together. This will ensure that the flavors are evenly distributed throughout your protein balls.
2. Prepare the Wet Mixture:
In a smaller bowl, blend the softened cream cheese, honey (or maple syrup), and vanilla extract. Use a hand mixer or just a whisk to mix it until the mixture is smooth and creamy. This will help to incorporate all the flavors nicely.
3. Combine Everything:
Now, pour the wet ingredients into the bowl with the dry ingredients. Stir everything together until a sticky dough forms. If you find that the mixture is too dry and crumbly, just add a bit more honey or a splash of milk, one tablespoon at a time, until it’s sticking together well.
4. Add Optional Ingredients:
If you want to add some extra flavor and texture, fold in the chopped nuts or almond flour at this stage. This is completely optional, but it adds a nice crunch!
5. Roll into Balls:
Using your hands, scoop out a small amount of the mixture and roll it into approximately 1-inch balls. This should make about 12-15 balls depending on your size preference. Place the formed balls on a parchment-lined tray.
6. Chill the Protein Balls:
Once all the balls are formed, pop them into the refrigerator for at least 30 minutes. This chilling time helps them firm up and makes them easier to eat.
7. Store and Enjoy:
After they are chilled and firm, store your strawberry cheesecake protein balls in an airtight container in the fridge for up to one week. They make a perfect on-the-go snack or a healthy dessert option!
Enjoy the delightful combination of strawberry and creamy cheesecake in these nutritious little bites! They’re not only delicious but also great for refueling after a workout or a midday craving. Happy snacking! 🍓
Can I Use Fresh Strawberries Instead of Freeze-Dried?
Yes, you can use fresh strawberries, but keep in mind they’ll add moisture to the mixture. If you go this route, try to blot the fresh strawberries with a paper towel to remove excess moisture and adjust the honey or maple syrup quantity accordingly to prevent the mixture from becoming too sticky.
How Do I Store These Protein Balls?
Store the protein balls in an airtight container in the refrigerator for up to one week. They can also be frozen; just place them in a single layer on a baking sheet until frozen, then transfer them to a freezer-safe bag or container. They can last in the freezer for up to 2 months!
Can I Make These Protein Balls Vegan?
Absolutely! To make them vegan, substitute the cream cheese with a plant-based cream cheese alternative and use maple syrup as your sweetener. Ensure the protein powder is plant-based as well!
What’s the Best Way to Roll the Balls?
For easier rolling, make sure your mixture is well-combined and slightly sticky. If it’s too dry, add a bit of milk or honey until it holds together. Use your hands to roll into 1-inch balls; dampen your hands with water to prevent the mixture from sticking to your fingers!